ASCII Art
I've always liked the look of ASCII art. I'm not much of an artist, though, so composing anything more than a stick figure is beyond me. But I had an idea for automatically generating ASCII from an image file. The process is simple enough. We examine each tile of the image and compare it to each ASCII glyph and find the one that matches best. Then we just repeat this over every chunk of the image.
Once again, PIL and numpy are our friends for handling image data as arrays. PIL also lets us get raw pixel data from any font. I'm using DejaVuSansMono, since a monospace font will be simpler to work with.
from PIL import Image, ImageFont, ImageDraw
import random
import numpy as np
First, let's get our font and figure out the size of each glyph. Since it's monospace, all glpyhs should be the same size.
FONT = ImageFont.truetype("DejaVuSansMono.ttf", size=12)

FONT_WIDTH = FONT.getbbox("M")[2]
FONT_HEIGHT = FONT.getmetrics()[0] + FONT.getmetrics()[1]
ImageFont stores only the bitmap data it needs, so we'll want to add back in some whitespace padding for glyphs that don't take up the whole area. For a given character, we can get an array of size FONT_WIDTH x FONT_HEIGHT like so:
def get_font_bmp(char):
    grid = [0] * (FONT_WIDTH * FONT_HEIGHT)

    # Extract the variable-sized glyph mask and its offset
    mask, (offset_x, offset_y) = FONT.getmask2(char, mode="1")
    w, h = mask.size
    pixels = list(mask)
    bmp = []
    for y in range(h):
        for x in range(w):
            grid_y = y + offset_y
            grid_x = x + offset_x

            # Ensure we stay safely within the boundaries of the grid
            if 0 <= grid_x < FONT_WIDTH and 0 <= grid_y < FONT_HEIGHT:
                grid[grid_y * FONT_WIDTH + grid_x] = 255 if pixels[y * w + x] > 0 else 0

    return np.array(grid).reshape(FONT_HEIGHT, FONT_WIDTH)
So which characters do we want to use in our images? At first, I thought why not just throw all the characters in the mix, but I didn't like the results. In the context of an image, so many letters look rather similar. After some trial and error, I settled on a much smaller subset of symbols:
char_bmps = {}
for c in r'#^v<>0O°()}{][!=,./|_-`~:;\\':
    char_bmps[c] = get_font_bmp(c)
This takes care of our font data. Now we can load an image:
def get_img(fname):
    test_img = Image.open(fname)
    test_gray = test_img.convert("L")
    resized_img = test_gray.resize((80*FONT_WIDTH, 80*FONT_HEIGHT), Image.Resampling.LANCZOS)
    arr = np.array(resized_img)
    return arr
In addition to loading, I also rescale it to be 80 characters wide and 80 characters tall. This may introduce some distortion, depending on the dimensions of your starting image. I also convert to grayscale, since when we compare regions to our ascii characters, those are black and white bit masks. Speaking of, how should we do that comparison? I just picked something dead simple. We compare each pixel and sum the absolute values of each difference. A lower score means a better match:
def get_delta(a, b):
    assert a.shape == b.shape
    diff = a - b
    return int(sum(sum(abs(diff))))


def match_char(subarr):
    scores = []
    for k, v in char_bmps.items():
        delta = get_delta(v, subarr)
        scores.append((k, delta))
    top = sorted(scores, key=lambda x: x[1])[:3]
    return random.choice(top)[0]
I also introduced a little bit of randomness. Instead of always picking the best choice, I randomly pick one of the top three. This prevents the image from having large regions of identicial characters, which I felt looked rather boring. This also introduces something akin to a film grain effect when it comes to animations. So let's put it together and generate some ASCII:
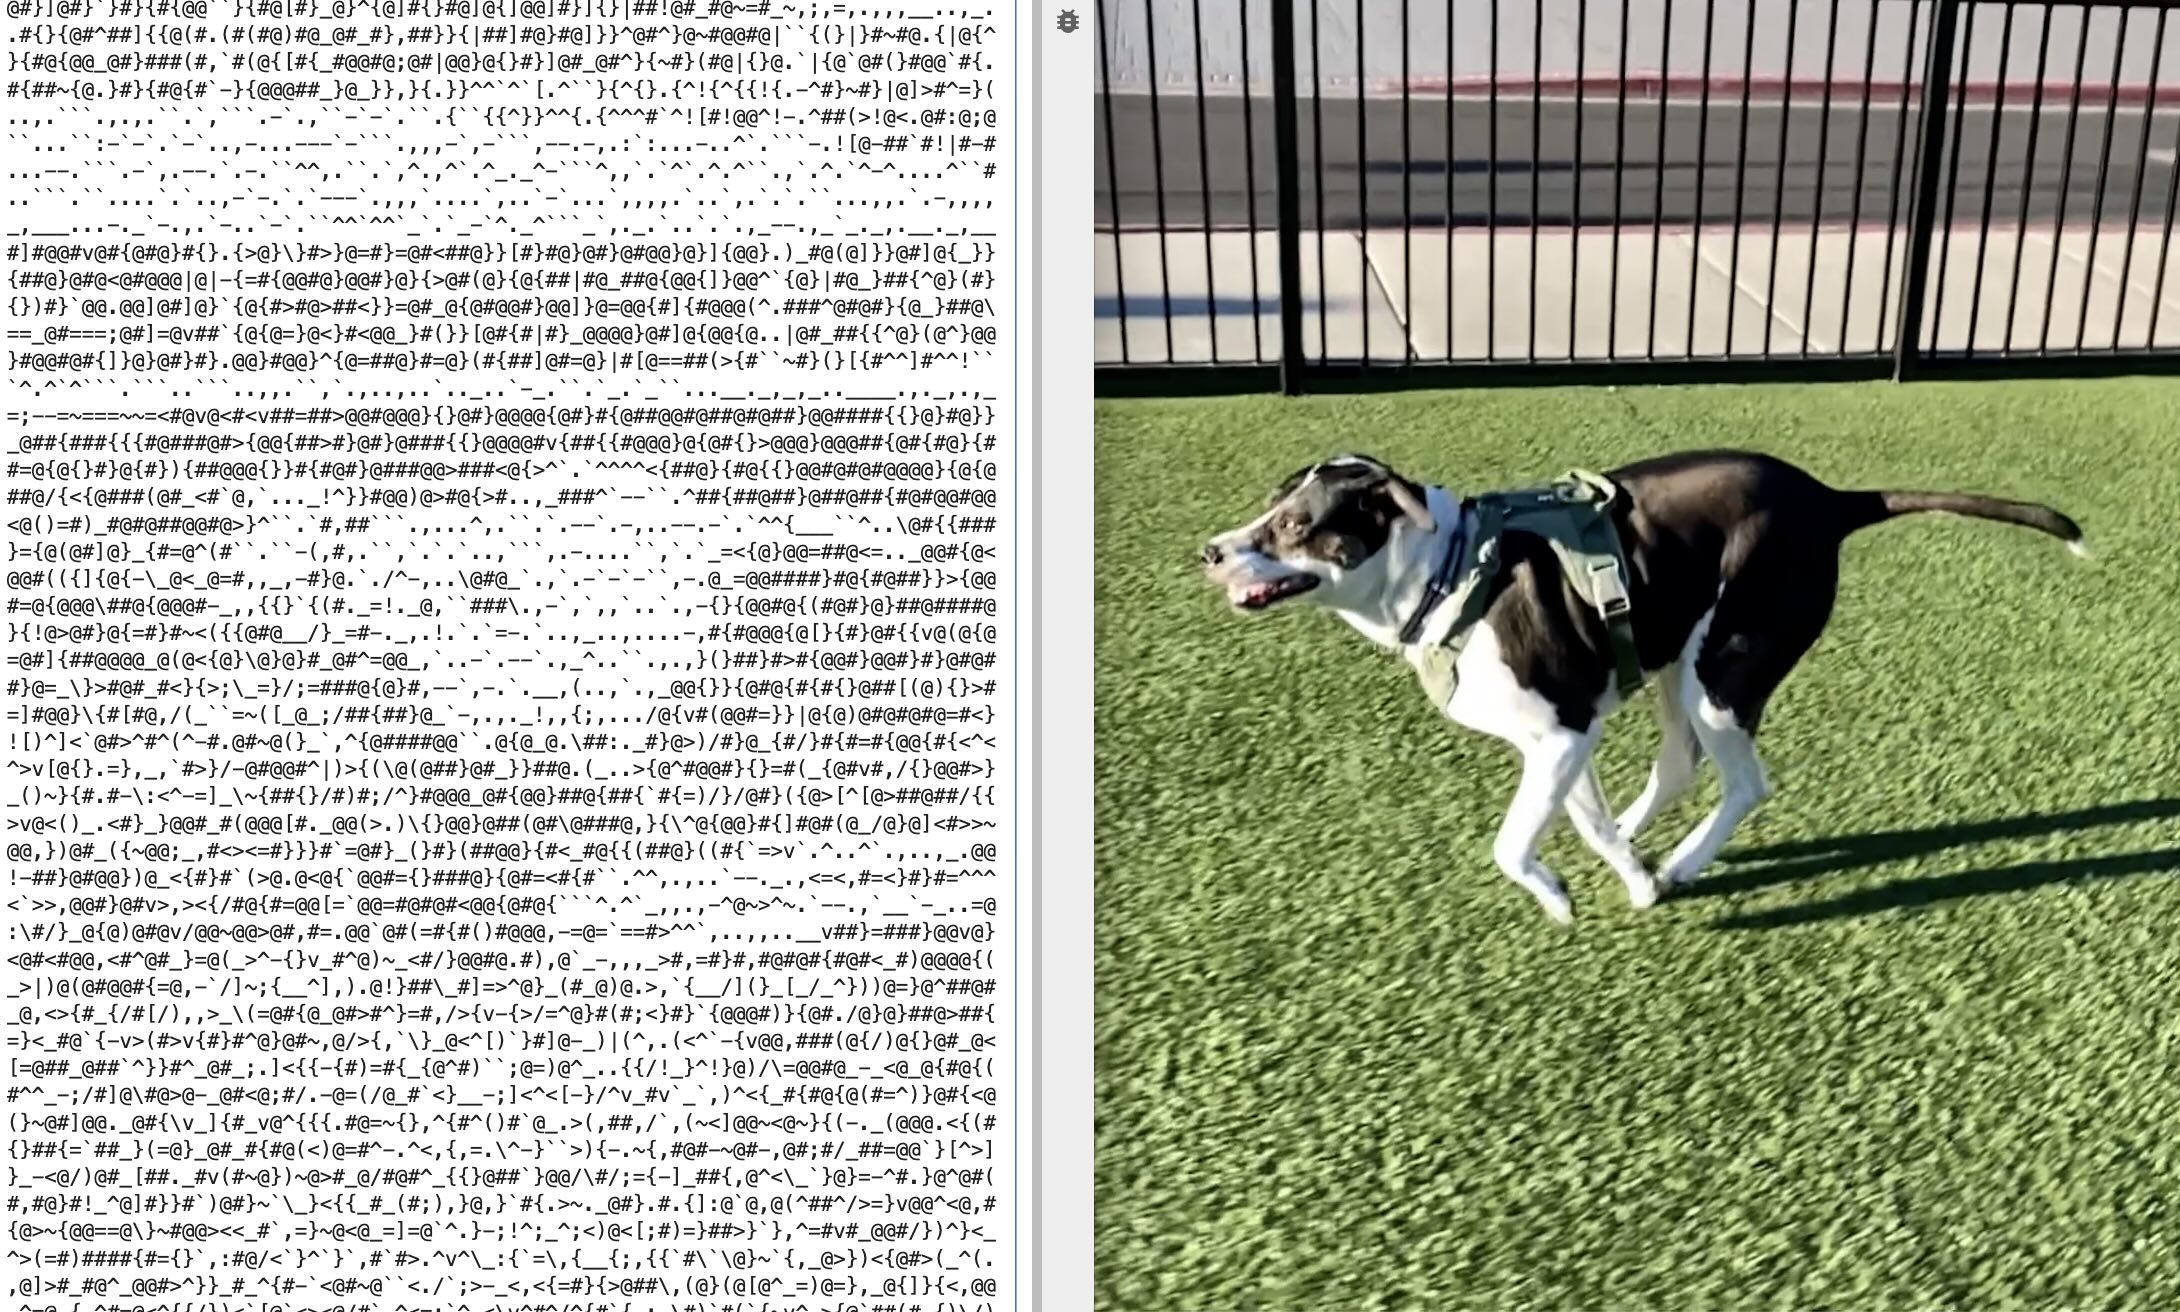
So we've lost a lot of detail. Trying to compress a photograph of my dog into a 50 x 80 character array was always going to be lossy. But I'm much happier with the results when we try to animate this conversion. Thanks to the magic of ffmpeg, we can get a series of still frames from a video, do our ascii conversion on each, then stitch them back into a video. And this, I think, looks a lot cooler:
The ffmpeg tool has a million command flags, but this is what worked for me to split a raw input video into frames:
bash
 ffmpeg -ss 00:0:00 -i raw.mp4 -vf "fps=10" frame_%04d.png
This results in a series of still images with names like frame_0001.png. We can loop over these files, do our transformation, and create new png files by just writing text with PIL:
def build_image(asci):
    img = Image.new("RGB", (80*FONT_WIDTH, 50*FONT_HEIGHT))
    d = ImageDraw.Draw(img)
    for i, row in enumerate(asci):
        d.text((0, i*FONT_HEIGHT), row, font=FONT, fill=(255, 255, 255))
    return img
And with the magic of import subprocess, we can find all relevant files from the output of ls, convert each to ascii, then save new frames:
list_files = subprocess.run('ls', capture_output=True).stdout.decode().split('\n')
frames = [f for f in list_files if 'frame' in f]

for inframe in frames:
    raw_img_arr = get_img(inframe)
    asc = gen_ascii(raw_img_arr)
    out_img = build_image(asc)
    out_img.save(inframe.replace('frame', 'asc_frame'))
And finally, we run another ffmpeg command to stich our asc_frame png files together:
raw_cmd = "ffmpeg -framerate 30 -i asc_frame_%04d.png -c:v libx264 -pix_fmt yuv420p output.mp4"
subprocess.run(raw_cmd.split(' '))
Et voila. Admittedly, this is a slow process. I suspect that someone more clever than me could rework this into a shader, which would paralellize the conversion process and speed things up considerably. I might attempt that in the future. Or implement something more like a 'matrix' effect with vertically scrolling text. Current script is on github.